
If the reader has been able to get an old microammeter from some old-fashioned appliance out of use, you can use it in building a sensitive continuity tester and resistance gauge. The circuit is very simple and useful.
An ohmmeter is an instrument that measures resistance, and is usually part of multimeters.
With a sensitive microammeter or even milliamperimeter we can build with ease and use it in the test of components in our bench.
For a microammeter of 100 uA we can measure resistances up to 100k and with a 0 to 1 mA, we can measure resistance up to 10 k ohms.
The circuit is very simple and can be powered by one or two small batteries.
There is no need for amplifier elements and the unit has a single adjustment through a trimpot.
In figure 1 we have the complete diagram of the apparatus.
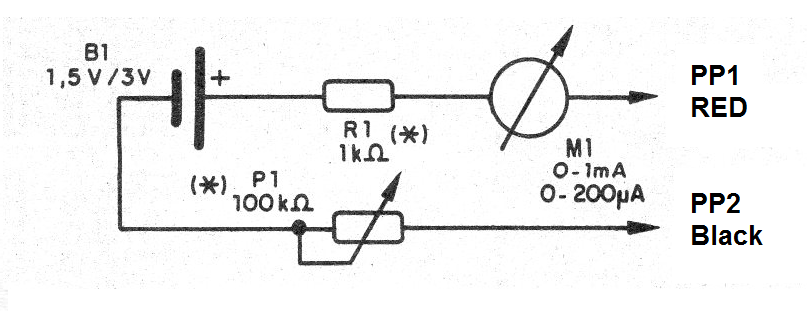
Since few components are used, the assembly can be made based on a small terminal strip, as shown in figure 2.
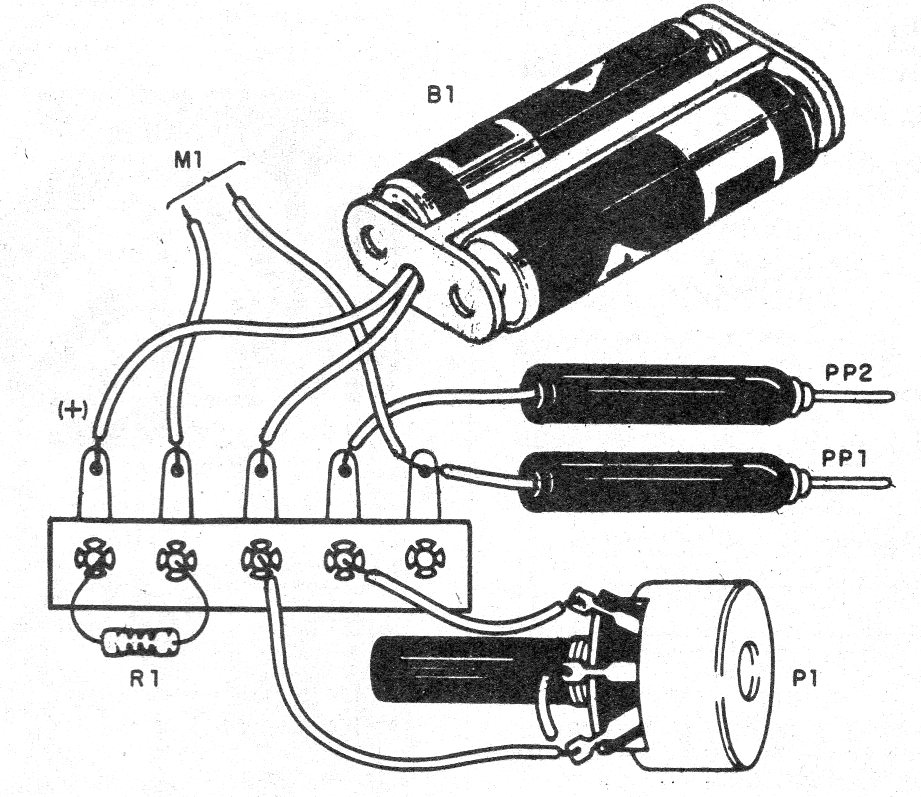
To use a test lead on the other and zero the circuit acting on the trimpot so that the instrument sets the maximum current.
Then just test the component by reading its indication. A scale can be made based on resistors of known values.
Material list
M1 - microammeter or milliammeter
PP1, PP2 - probes
B1 - 1 or 2 batteries
R1 - 1k ohms x 1/8 W - resistor - brown, black, red
P1 - 100 k ohm trimpot (or potentiometer)
Several:
Terminal strip, mounting box, etc.


